Achieving Perfect Corners in Your Basement Drywall Project

October 21, 2024

Finishing your basement with drywall is a rewarding step that brings your space closer to completion. However, one of the most challenging aspects of this process is achieving perfectly smooth and clean corners. Whether it’s inside or outside corners, ensuring a flawless finish can make the difference between a polished, professional look and a subpar result. At Basement Renovations London, we understand that sharp, well-finished corners add significant visual appeal to your basement. In this article, we’ll walk you through the best practices and techniques to achieve perfect corners in your basement drywall project.


Why Perfect Corners Matter

While flat surfaces are critical in drywall installation, the corners are where your eye is naturally drawn. Poorly done corners can stand out immediately, detracting from the room’s overall appearance. Smooth, seamless corners give your basement a professional, clean look, making all the difference when it comes to the final aesthetic of your finished space.


Perfecting corners is essential for:

  • Durability: Well-finished corners are more resistant to bumps and cracks.
  • Aesthetic appeal: Smooth, seamless corners enhance the overall appearance.
  • Long-term maintenance: Quality corners are easier to paint, clean, and maintain.


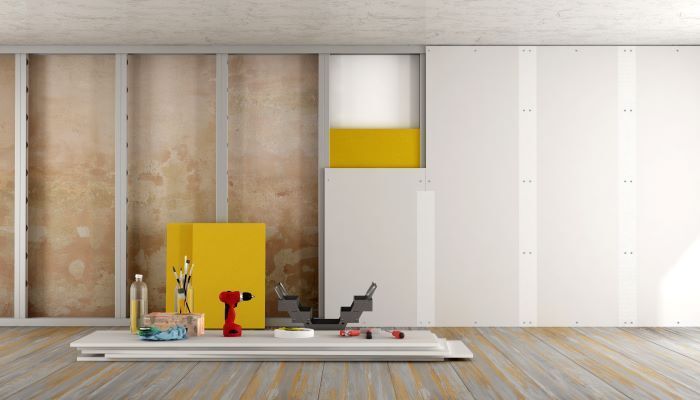
Tools You Need for Finishing Drywall Corners

Before diving into the drywall corner-finishing process, it’s important to gather the necessary tools and materials. Here’s what you’ll need:

  • Drywall joint compound (mud)
  • Paper or mesh drywall tape
  • Corner bead (metal, vinyl, or paper-faced)
  • Drywall taping knives (various sizes)
  • Sanding block or pole sander
  • Measuring tape
  • Utility knife


With the right tools in hand, you're ready to begin working on those all-important corners.


Step 1: Preparing the Drywall for Corners

Preparation is key to achieving smooth, perfect corners. Before applying corner tape or bead, make sure the drywall sheets are properly aligned and securely fastened. Check for gaps between drywall sheets and trim any excess with a utility knife.


For Inside Corners:

  • Use a sanding block to smooth out any rough edges where the two drywall panels meet.
  • Ensure that the gap between the two panels is minimal, as this will make taping easier.


For Outside Corners:

  • Ensure the drywall extends past the corner edge enough to accommodate the corner bead. The corner bead should rest flat without gaps.


Step 2: Applying Drywall Tape to Inside Corners

Inside corners are where two sheets of drywall meet, creating a 90-degree angle. For these areas, paper tape is often preferred because it can be folded along its center crease, fitting snugly into the corner.


Steps to Apply Paper Tape:

  1. Apply joint compound: Use a 4- to 6-inch taping knife to apply a thin layer of joint compound along both sides of the corner.
  2. Place the tape: Fold the paper tape along its center crease and press it into the joint compound. Use your knife to smooth the tape evenly along the corner, removing any bubbles or wrinkles.
  3. Add a second coat: After the first layer dries, apply a second coat of joint compound over the tape, feathering the edges for a seamless finish.
  4. Sand lightly: Once the compound is dry, lightly sand the corner for a smooth surface.


Step 3: Installing Corner Bead on Outside Corners

Outside corners are more vulnerable to damage, making the installation of a corner bead essential for protection and durability. There are several types of corner bead available, including metal, vinyl, and paper-faced options.


Steps to Install Corner Bead:

  1. Cut the corner bead: Measure the length of the corner and cut the corner bead accordingly. Use tin snips for metal bead or a utility knife for paper-faced bead.
  2. Attach the corner bead: If using metal or vinyl corner bead, secure it to the corner with drywall screws or nails. Paper-faced corner bead is installed by embedding it in joint compound.
  3. Apply joint compound: After the corner bead is in place, use a wider taping knife (about 8-10 inches) to apply a layer of joint compound over the bead, feathering it out on both sides to blend with the drywall surface.
  4. Second and third coats: Apply additional layers of joint compound, allowing each coat to dry fully before sanding between coats. This will help smooth out any ridges or bumps and ensure a perfectly seamless corner.
  5. Final sanding: Once all coats have dried, sand the surface until smooth, being careful not to sand through the compound or damage the corner bead.


Step 4: Sanding and Finishing

Sanding is a crucial step to ensure your drywall corners are smooth and ready for paint. Use a fine-grit sanding block or pole sander to lightly sand all corners, focusing on blending the edges where the compound meets the drywall.

  • Tip: Always wear a dust mask during sanding to protect yourself from drywall dust. If you're sanding a large area, consider using a vacuum sander to minimize dust.
  • After sanding, wipe down the walls with a damp cloth to remove any dust before applying primer and paint.


Step 5: Prime and Paint

After your drywall corners are perfectly smooth, apply a coat of primer to seal the surface and prepare it for painting. Priming helps the paint adhere better and provides a uniform finish. Once primed, apply your chosen paint color and admire the crisp, flawless corners that will enhance the overall look of your basement.


Conclusion

Achieving perfect corners in your basement drywall project may seem like a daunting task, but with the right tools, techniques, and attention to detail, you can create a professional-looking finish that elevates the entire space. Whether you're tackling the job yourself or hiring a professional, getting the corners right will make a huge difference in the quality and durability of your basement walls.


At Basement Renovations London, we specialize in basement drywall finishing and can help you achieve the perfect finish for your basement renovation. Contact us today for expert drywall installation, taping, and finishing services that will make your basement look its best.

You might also like

December 2, 2024
Basement renovations are an excellent way to maximize the functionality of your home, and choosing the right windows is a critical part of the process. Basement windows not only enhance natural light and ventilation but also play a key role in energy efficiency, aesthetics, and safety. For homeowners in London, Ontario, selecting the best style of basement windows can significantly impact the success of your renovation. Here’s a guide to help you make the right choice.  Why Basement Window Style Matters Unlike windows in other parts of your home, basement windows often face unique challenges such as limited space, below-grade installation, and moisture exposure. Choosing a style that complements your basement’s needs while adhering to local building codes is essential. Popular Basement Window Styles 1. Hopper Windows Hopper windows are hinged at the bottom and open inward, making them a great choice for basements with limited wall space. Pros : Excellent ventilation. Compact and suitable for small spaces. Provides a tight seal against drafts when closed. Cons : Limited view compared to other window styles. 2. Slider Windows Slider windows glide horizontally, making them ideal for larger basement walls. Pros : Easy to operate. Offers a wider view of the outdoors. Low maintenance due to fewer moving parts. Cons : May not provide as tight a seal as hopper windows. 3. Awning Windows Similar to hopper windows, awning windows are hinged at the top and open outward. Pros : Can remain open during light rain without letting water in. Great for ventilation. Cons : Requires sufficient exterior space to open fully. 4. Egress Windows Egress windows are required by building codes for basements being used as living spaces. They are large enough to serve as an emergency exit. Pros : Essential for safety. Allows ample natural light into the basement. Cons : More expensive to install due to size and code requirements. 5. Fixed Windows Fixed windows do not open but are excellent for providing natural light and enhancing aesthetics. Pros : Energy-efficient due to the absence of moving parts. Ideal for basements where ventilation is not a priority. Cons : No ventilation capability. Factors to Consider When Choosing a Style 1. Purpose of the Basement If your basement is being converted into a bedroom or living area, egress windows are non-negotiable. For storage or utility basements, hopper or fixed windows might suffice. 2. Natural Light Needs Slider and egress windows allow more sunlight, making them perfect for spaces where brightness is a priority. 3. Ventilation Requirements If proper airflow is crucial, consider hopper or awning windows. 4. Energy Efficiency Double-pane or triple-pane glass is recommended for insulation, regardless of the style. 5. Budget Different window styles and sizes come with varying price points. Balancing functionality and cost is key. Enhancing Basement Windows Window Wells : Protect below-grade windows from water and debris while enhancing light. Window Treatments : Opt for moisture-resistant blinds or shades for style and privacy. Security Features : Install locks or reinforced glass for added safety. Why Choose Basement Renovations London? At Basement Renovations London, we understand the intricacies of basement design and window installation. Our team can help you choose, install, and maintain the perfect windows to suit your needs and budget. From meeting local building codes to ensuring flawless installation, we handle it all. Conclusion Choosing the right style of basement windows is more than an aesthetic decision—it’s about functionality, safety, and comfort. Whether you’re looking for increased natural light, improved ventilation, or a safe escape route, there’s a basement window style to fit your space. Contact Basement Renovations London today to discuss how we can help transform your basement into a brighter, more functional part of your home!
November 24, 2024
Basement demolition can be the first step toward transforming an underutilized space into something functional and inviting. Whether you're planning a full renovation or simply refreshing the look of your basement, removing old flooring and walls is often necessary to lay the groundwork. Here are some essential tips for tackling basement demolition effectively and safely. 1. Plan Your Project Thoroughly Before starting demolition, it’s critical to have a clear plan. Identify the areas you’ll be working on, such as specific walls or flooring, and decide whether you’re removing everything or just a section. Evaluate the condition of the materials—old flooring and walls may harbor mold, asbestos, or other hazards that require special handling. Checklist for Planning: Measure the area to estimate material removal. Determine what will stay and what will go (e.g., support walls, electrical wiring). Get the necessary permits if required by local regulations in London, Ontario. 2. Gather the Right Tools and Safety Gear Demolition is hard work and requires specialized tools to complete efficiently. Having the proper equipment on hand ensures a smoother process and minimizes risks. Must-Have Tools: Pry bars: Essential for removing trim and baseboards. Sledgehammers: Useful for breaking through walls. Utility knives: To cut through drywall or carpets. Power tools: Such as reciprocating saws for larger cuts. Safety Gear: Safety goggles and gloves. A dust mask or respirator to protect against debris. Durable work boots with steel toes. 3. Address Potential Hazards Old basements often have hidden issues like lead paint, asbestos in old insulation or tiles, or mold from water damage. Hire professionals to assess the space before demolition begins. Tips for Dealing with Hazards: Test for asbestos and lead before cutting into materials. Use HEPA filters during demolition to minimize dust circulation. Seal off other areas of your home to contain debris. 4. Start with Flooring Removal Removing old flooring can reveal underlying issues, such as cracks in the concrete or water damage. Start by clearing the space of furniture and personal items to make the job easier. Steps for Flooring Removal: Carpets and padding: Use a utility knife to cut sections for easier removal. Tiles: Break them with a sledgehammer and pry them loose. Hardwood or laminate: Use a pry bar to lift planks carefully. Dispose of the materials responsibly by separating recyclable components, such as wood or tiles. 5. Tackle Wall Removal with Precision Demolishing walls requires care, especially if electrical wiring or plumbing is involved. If you’re removing drywall, start by identifying load-bearing walls and marking areas with wiring. Steps for Wall Demolition: Turn off utilities: Shut off electricity and water to the area. Remove trim and baseboards: Pry them loose to access the wall edges. Break through drywall: Use a utility knife to cut sections, then pull them down with minimal mess. For interior studs, a reciprocating saw can help cut through nails and wood easily. 6. Manage Waste Disposal Demolition generates a significant amount of waste. In London, Ontario, there are specific regulations for disposing of construction debris. Waste Management Tips: Rent a dumpster for large-scale demolition projects. Separate hazardous materials for proper disposal. Contact local recycling centers for items like metal studs or wood. 7. Consider Hiring Professionals While DIY demolition can save money, hiring professionals ensures safety and efficiency, especially for large or complex projects. Experienced contractors can handle unexpected challenges like structural issues or hazardous materials with ease. 8. Prepare for Renovation Once the demolition is complete, clean the space thoroughly and inspect it for issues such as water leaks or uneven surfaces. This step ensures that your new flooring and walls will be installed on a solid, problem-free foundation. Transform Your Basement with Basement Renovations London Ready to take the first step in transforming your basement? At Basement Renovations London , we specialize in safe, efficient demolition and renovation services to bring your vision to life. From removing outdated materials to installing modern finishes, our team is here to help. Contact us today to schedule a consultation and get started on your basement project!
November 18, 2024
When it comes to basement renovations , one of the most overlooked yet crucial aspects is securing the necessary permits. Whether you're looking to create a cozy family space, a functional home office, or a rental suite, understanding the permit requirements for basement renovations is essential. If you’re in London, Ontario, and planning to transform your basement, here’s everything you need to know about the role of permits in your renovation project. Why Are Permits Necessary? Permits are more than just paperwork—they are a critical part of ensuring that your basement renovation is safe, up to code, and legally compliant. Here’s why permits are important: 1. Ensuring Safety and Compliance Building codes exist to protect the safety of homeowners. Permits ensure that your renovation complies with local building codes and standards. This includes everything from electrical wiring and plumbing to structural changes and fire safety measures. Without the proper permits, you may end up with a basement that poses risks to you and your family. 2. Avoiding Legal Issues If you proceed with a basement renovation without the required permits, you could face legal consequences. The City of London can issue fines, and you may be required to halt the renovation or even undo completed work. Having permits in place helps you avoid these legal hassles. 3. Increasing Property Value A properly renovated basement can significantly increase the value of your home. However, if you ever decide to sell, buyers and real estate agents will likely ask for proof of permits for any major renovations. A lack of permits can lead to a decrease in property value or complications during the sale. 4. Insurance Coverage Home insurance policies often require that renovations are done according to code. If an issue arises—like flooding or fire damage—in an unpermitted basement, your insurance provider may refuse to cover the damages. Permits protect you from this risk. When Are Permits Required for Basement Renovations? Not all basement renovations require a permit, but many do. Here’s a breakdown of the most common projects that typically need a permit in London, Ontario: 1. Structural Changes If your renovation involves removing or adding walls, creating new windows, or altering the structure in any way, you’ll need a permit. This ensures the integrity of your home’s foundation and overall stability. 2. Electrical Work Adding new outlets, wiring, or lighting fixtures requires an electrical permit. This is to ensure all electrical work meets safety standards and reduces the risk of fire hazards. 3. Plumbing If you’re adding a bathroom, kitchen, or laundry room in your basement, a plumbing permit is required. This covers new plumbing installations, relocating pipes, or installing new fixtures. 4. HVAC and Ventilation If your basement renovation includes adding new heating, cooling, or ventilation systems, you’ll need a permit to ensure they are installed correctly and safely. 5. Egress Windows and Exits Creating an additional bedroom in your basement? You’ll need an egress window that meets specific size requirements to ensure a safe exit in case of emergency. A permit is needed to install these windows. 6. Fire Safety and Insulation Installing insulation, drywall, or fire-rated materials may require a permit to ensure your basement meets fire safety regulations. How to Obtain Permits for Basement Renovations in London, Ontario The process of obtaining permits can seem daunting, but it’s a necessary step to ensure your renovation is safe and compliant. Here’s how to get started: 1. Consult with a Professional Before you begin your basement renovation, consult with a professional contractor who is familiar with local building codes and permit requirements. They can guide you through the process and even handle the permit application on your behalf. 2. Submit Your Permit Application You’ll need to submit a permit application to the City of London’s Building Division. This often includes detailed plans of your renovation, including layouts, materials, and any structural changes. The city will review your plans to ensure they meet local codes. 3. Schedule Inspections Once your permit is approved, you’ll need to schedule inspections at various stages of the renovation. These inspections ensure that the work is being done correctly and according to code. Common inspections include framing, electrical, plumbing, and final completion. 4. Final Approval After all inspections are passed, you’ll receive a final approval or completion certificate. This document serves as proof that your basement renovation was done legally and safely. Tips for a Smooth Permit Process Navigating the permit process can be challenging, but these tips can help make it smoother: Plan Ahead: Start the permit application process early to avoid delays in your renovation timeline. Work with Licensed Contractors: Hire experienced and licensed contractors who are familiar with local building codes and can assist with permits. Keep Records: Save all permit documents, inspection reports, and approvals. These will be useful for future reference, especially if you decide to sell your home. Be Honest and Transparent: Don’t cut corners or skip permits to save money. This can lead to costly fines and complications down the road. Conclusion Basement renovations are a fantastic way to add value, space, and functionality to your home. However, the importance of obtaining the right permits cannot be overstated. By following the guidelines for permits and working with professionals, you can ensure a smooth renovation process that enhances the safety and value of your property. At Basement Renovations London , we are here to help you navigate every step of your basement renovation, from initial planning to final inspection. Contact us today for a consultation and let us bring your basement vision to life while ensuring everything is up to code.
More Posts

Request a free quote!

Request a free quote!

Contact Us

Share by: